Choosing Soft Modifiers

With the gazillion or so soft light mods out there, it is easy to be overwhelmed by the choices available. And while I have probably shot with more of them that I would care to admit, there are four soft mods that I go back to again and again.

As it happens, these four are reasonably priced, too.
__________

Soft is Relative

So, which of the light sources above is the softest? The one in the back, right?

Not necessarily. The 60″ source in back is not as soft at 10 feet away from your subject as the 8×9″ source is at 10 inches away. A good rule of thumb to remember is that a light source is soft when it looks large to your subject. This nets out the two variables of size and distance.

Example: Even a bare speedlight looks soft to a subject only a couple inches away.

Long story short, if you want soft light you will have to consider the working distance at which you’ll be using it. The further back your light source, the larger your light mod will have to be.

So front to back, here is the straight dope on the four mods pictured above.

1. The LumiQuest Soft Box III

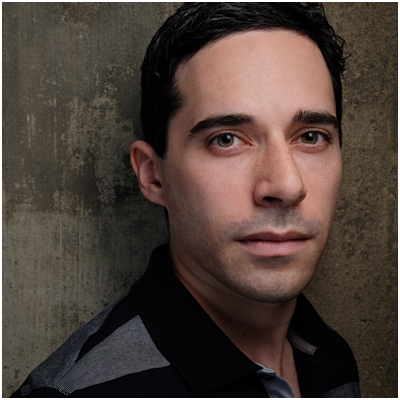
At 8×9″, the LumiQuest SB-III can be very soft — as long as you are working the light literally right up next to the subject. Case in point, this headshot of Ben I did for an ad for the SB-III when it first came out.

With a flat front edge, the light is easy to feather. This means you can work in the edges of the beam for more interesting (i.e. uneven) illumination.

Pros: The SB-III is small, and folds flat. This means it travels great, hiding in the back flap of my Domke F3 or just about anywhere else. It is also pretty reasonable, at under $50. (Especially considering the SB-III has a lifetime guarantee, unique on this list.)

Cons: It’s small size means it is literally soft in only in the knife-fight range. Back it up more than a couple of feet and it starts to get hard. Actually, I tend to use this to my advantage, making the light more versatile just by varying the distance. That is one of the reasons I use it so much.

And speaking of that, most of the time I use an SB-III, I will do so in combination with a fill light. (Example here.) This gives a combination of both shape and detail.

2. Beauty Dish

The next step up, size-wise, gets us to a beauty dish. A broad, shallow reflector, it throws a modestly soft light at portrait distances. There is nothing particularly “beautiful” about it. The dish just has good PR, I guess.

A light this size won’t wrap as much as a giant octa or umbrella when used at the same distance, which can be a good thing. So while some people may think of it as a beauty dish, I tend to think of it as a character dish.

Again, I almost always use it with fill. The shot above (more here) is a good example.

When used with a giant, on-axis fill light, as in this Martin Prihoda cover shoot, the beauty dish really starts to live up to its name. The shadows from a dish are distinct, and controlling their depth with another light source gives you a wide range of possibllity.

Pros: A dish gives you soft(ish) light that can stand up to a breeze. Soft boxes and (especially) umbrellas can turn into a sail in even a light wind. The beauty dish will hold up in a moderate wind — especially when sandbagged. Also, the fact that the dish is circular gives a signature shape on the face as compared to a rectangular soft box. Some people prefer this, but I find it kinda arbitrary.

Cons: Does not fold in any way, so travels like crap. Expect to have to buy a protective case for it. Which only adds to the next downside. Of the four sources listed here, the beauty dish is the most expensive.

I have a few dishes, including one that I got for free from Profoto in a promotion that would have cost me north of $300. I did not know which I wanted (silver or white) so I chose silver for more efficiency. In hindsight I should have chosen white, which I now use far more often.

But I was not gonna pony up for another full-price Profoto dish. So I ended up with the white FTX 22″ Beauty Dish ($105.00 – $130.00) shown above.

Being an aftermarket universal fit dish (one dish, many mounts) it can be a little quirky in some ways. But overall I have been happy with it. They also do a grid for the dish ($85.00). So if you are into controlling the beam of the light, the price difference (OEM vs aftermarket) may be even bigger.

3. Westcott Double-Fold 43″ Shoot-Through Umbrella

Usually recommended as the first soft light mod for a space-conscious photographer, the double-fold umbrella practically disappears in your bag. It collapses down to 15″. (Best of all, they are just silly cheap.)

I started out using it in typical fashion, 45 degrees up and over, as do most photographers. These days I am much more likely to fly it over the top of a subject, as in the falconer shot seen above:


(You can read a full rundown here.)

Or sometimes it is literally on the floor, as in with this portrait.

Pros: Hello … it’s dirt cheap. Also, travels extremely well. If you are into guerilla lighting, this is your mod. Also can be very powerful, used right up next to your subject. This is something you cannot do with a reflected umbrella because the shaft can get in the way.

Cons: They are pretty fragile. Between the double folding arms and the telescoping hollow shaft, expect them not to last too long. (A little breeze can get them, too.) Also, the light is hard to control — an umbrella spews out light like a frat boy puking at 2:30am after a party. Very little directional control. Raw light can spill past the edge, too.

But for under $20, who can complain? I usually grab a couple to be safe.

4. Photek 60″ Softlighter II


Combining the best features of a shoot-through umbrella and a large soft box, I like to think of the large Softlighter II as a poor man’s octa.

It is a convertible shoot-through umbrella that can double as a reflective one due to the removable black backing. And it comes with a very efficient diffuser screen, turning the umbrella into a wonderfully even light source. As a bonus, the umbrella shaft is segmented, so you can remove half of it after you open it. This makes it possible to use it in very close. It is large-octa light quality, for about $120.

How good are they? Even people who can afford to use any expensive mod they want frequently opt for the affordable Photeks. If you are an Annie Leibovitz fan, she frequently uses them as her key light, as seen here:

(And for a bit of fun, you watch this video annotated—Annie-tated?—in this dedicated post.)

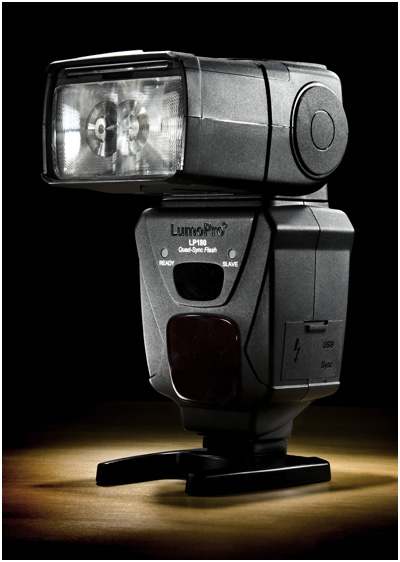
Pros: Way cheap, as compared to the octa it largely replaces. Versatile as an umbrella, as described above. Gorgeous light with the diffuser. Very lightweight — easy to boom without expensive gear. Takes a speedlight well.


(A Photek 60″ how we lit the photo above, as detailed here.)

Cons: They are not as heavy-duty as an octa — but to be honest I have yet to kill one. Also, the front is not a clean light source like an octa. You can see the strobe unit. So if you are shooting reflective objects (glass, etc.) this may not be for you.
__________

So those are my Four Horsemen of soft light. I have bought (and shot with) a lot of soft mods over the past 35 years, but those are the ones I keep going back to. I highly recommend each, for the reasons above.

The main thing is to look at your working distance and see which light source will create the light you want at that distance. Fortunately, as you can see above, you don’t have to spend a ton of money to get versatile, soft light.

NEXT: Hard and Specialty Modifiers

Choosing Light Stands

Light stands are designed to oppose gravity. Pretty simple. And the designs are, for the most part, pretty similar. I think of light stands as being in three categories: normal stands, compact stands (seen just above) and specialty stands such as C-stands.

For light stands I like LumoPro for many of the same reasons I like the LumoPro LP180 speedlight. Their stands are well-built, reasonably priced and guaranteed out the wazoo. LumoPro has good service, too, should you need to replace a broken knob or bolt or whatever.

Honestly, it makes me wonder why other manufacturers don’t warranty their grip gear like this. Seems like a no-brainer, if you are making good stuff.

For normal, full-sized stands, I like the 10-foot LumoPro LP608. It is air-cushioned, has a five-year warranty and costs $45. It is a solid value choice and you can certainly spend more but get less.

Most stands are pretty interchangeable. That’s not to say that there aren’t some cool designs to be had. For a “splurge” light stand I’d consider Manfrotto stackers. They have a unique design that allows them to snap flat together for easy transport and space-saving storage. They are more expensive ($84 for 8-foot version and $115 for the 12-foot) so you’ll have to make that call. But they are a great upgrade if you frequently lug around a flock of light stands.

If you don’t need all of that functionality, skip the stackers. In fact, many speedlight folks who don’t need a lot of stand height prefer to use “compact” 5-section stands. They rise to about 7 feet and collapse to about 21″.

For that, my recommendation is easy and clear-cut: get the LumoPro LP605, seen above. It is the best-built of the five-section stands, includes ground spikes for more stability in wind and has LumoPro’s outsized warranty.

For $40, it is hard to go wrong here. There are more expensive versions of this, but they are not as well-built, have no ground spikes and you won’t get a five-year warranty either. Done deal.
__________

As far as C-stands go (more on what they are, here) they are pretty much all built like tanks. Which is part of their weighty charm. LumoPro C-stands ($100 for the riser and another $35 for the arm—make sure to get both pieces) are a good value choice as they back up the build quality with their five-year warranty.

If you want to get fancy, Kupo C-stands offer a quick-release mechanism for faster setup. But both are all but indestructable.

Buy Some Sand Bags…

While we are on the subject of stands, please do this: Take $23 (for 4) and buy some sand bags. Get the bags from Amazon. Four will do you well for many small shoots.

And the first time a stand fails to blow over because you had it properly (and cheaply) secured, they will have paid for themselves.

But Don’t Use Sand.

Skip the sand, as it will probably leak in your car or screw up the zippers. Rather, use “pea gravel,” from your local home improvement store. It’s super cheap ($3.50 worth will fill three sets of sandbags) and way less messy than sand.

You won’t need these cheap insurance policies until a stand comes down in the wind, breaking your flash or your mod or your subject’s noggin. Then you will have needed the sand bags retroactively.

Start with four or so. You’ll probably end up getting more as you go. Cheapest insurance (and piece of mind) policy you’ll ever buy.

NEXT: Soft Modifiers

Choosing Triggers

This is pretty simple and straightforward advice. First, start with a wire. Yep, a simple sync cable. It is cheap and reliable, and a great backup to have for when your wireless triggers decide to go all hinky on you. Which they sometimes will. Because…

Choosing Lights

Because big lights and small lights each bring a different set of considerations to the party, I am splitting my recommendations into speedlights and “studio lights.” (Although I hate that term.)

For speedlights, you have to decide if you wanna drive stick or automatic—AKA manual or TTL. I live in manual mode, which means I sacrifice some convenience for reliability and repeatability. It also means I can pay about a third as much for each of my flashes.

If you live by TTL, you will die by TTL. Or, at least your wallet will die a small, unnecessary death every time you need to purchase a flash.
__________

For manual speedlights, I wholeheartedly recommend the LumoPro LP180, about which I go into far more detail here. It’s built like a tank, syncs four different ways, has a fluid and intuitive user interface, a built-in light-stand socket, a built-in gel holder and has a two-year manufacturer’s warranty. No other speedlight comes close to claiming all of those useful features.

That it costs about a third as much as you would pay for an OEM branded flagship TTL flash is icing on the cake. If you can commit to shooting manually, this is your flash.

If you need TTL (and remember, this is the gear acquisition equivalent of joining the TTL mafia) I would consider eschewing the OEM flagship TTL flashes. They can run north of $500USD, which is just nuts.

The Phottix Mitros comes in Nikon and Canon variants and sells for about $300USD—with twice the warranty length. It does pretty much all the fancy stuff most of the OEM flashes do including the optical TTL triggering of other TTL units, be they other Mitros units or OEM units.

I will say that for the lesser price you will give up some ease of user interface. But this may well be that I was used to the OEM flash user interface and that of the Mitros is pretty radically different.

Finally, for some people the flagship OEM flashes will be just fine. For instance, if your name is Bill Gates they are a perfect choice for you.

On the opposite end of the spectrum, there are a ton of flashes constantly hitting the market from the far east, from a variety of pop-up brands. Some of the brands are recognizable because they bought the rights to use familiar but now bankrupt brands that were formerly trustworthy. They have spotty track records for quality. Factory warranties are short to nonexistent.

Many who read this will be tempted to go that route because of prices that are almost too good to be true. If that’s you, by all means knock yourself out. Some people need to be stung in the wallet to remember a lesson or bit of advice. I know I did when I was young. Good luck with that!
__________

As far as big lights go, there is a completely different set of variables to consider. Big lights are system-oriented, and you would do well to choose wisely in what will likely be a long-term relationship.

I spent a lot of time and money auditioning big lights over the past 25 years. I am really happy where I am now, and would have loved to make this good of a choice from the get-go. I wrote about researching and choosing big lights a couple years ago and at the time settled on a Profoto/Paul Buff hybrid choice.

I loved Profoto’s light mods and quality of light, but they were very expensive. And the battery options insanely so. So instead of battery versions of my Profotos, I went with Profoto plug-ins and a full Paul Buff Einstein setup for portable, battery-powered big lights. Sounds crazy, but for the price of just two AcuteB battery generators you can outfit yourself like an Einstein King.

So for the last couple of years I have had two full systems in my gear closet: Profoto plug-ins and Einstein 640s with portable battery packs. (But they also plug in.) And even though the Profotos are far more expensive, rugged and “professional” (whatever) I found myself again and agin choosing the Einsteins to use.

That’s because inexpensive or not, they are simply amazing flashes. And they come with a 2-year warranty (sensing a trend here?) and legendary factory service. Further, Paul Buff has finally taken some time to develop the modifier system that a good flash deserves. The reflectors and accessories are well-designed—and wonderfully inexpensive.

The caveat here is, this is pretty much a US-based choice/suggestion. One of the main reasons Paul Buff lights are so inexpensive is that he only sells direct, and mostly in the US. There are a couple of dealers outside the US but that starts to erode the value proposition pretty quickly.

So, to beginners looking for a great light at an amazing price in the US, I would suggest you strongly consider Einsteins. Not the similarly shaped and even cheaper AlienBees, however. They look similar, but are not in the same league as the Einsteins. Save your money and go Einstein. It is not that much more.

If you are outside of the US, I am sorry that this choice will be either not available or not nearly as good a value to you. So I would suggest that you look at other reputable flash brands (Bowens, Elinchrom, Hensel, Profoto, etc.) and choose the brand that works best for your needs and your wallet. This advice also holds for people for whom the Einsteins aren’t a good fit.

Again, I would suggest avoiding the temptation of the super-cheap mystery brands from the far east. Personal experience. But if you need some personal experience of your own to dissuade you in the future, by all means go right ahead.

Next: Triggers

Choosing Lenses

If you date your cameras, you marry your lenses. That’s because, unlike digital cameras, a well-chosen lens can serve you for a very long time.

I still have one lens that I bought thirty two years ago. And I bought it used. I doubt that will be the case with any of my digital cameras, ever.

In the past, I was a lens speed freak and was willing to spend great sums of money to have very fast glass. I now realize that lust was misplaced. If I had it to do over again (and I do, and have) I would lean more on reasonably fast primes and here’s why.

Moderately fast primes are (much) lighter, (much) cheaper and often just as sharp (or sharper) than their speedy siblings. For Nikon shooters, the Nikon 28, 50 and 85 f/1.8 trio of lenses are great examples of this. They weigh next to nothing in my bag and offer great performance. Also, I have moved away from primarily using fast zooms. Rather than a fast 24-70/2.8, I’d now opt for a trio of fast-ish primes and a decent, slower zoom to back them up.

This way, you get a stop (plus) faster at each focal length, backups throughout the 24-70mm range and you lose the most daunting aspect of the speed zoom: an expensive single point of failure.

In general, remember this when it comes to ultra-fast DSLR lenses: you pay through the nose for them when you buy them. And then you pay again, in weight, every time you lug them around. Remember that cameras have amazing high-ISO performance these days. And they are just going to get better as we go.

As for my Fuji lenses, it is pretty hard to go wrong with their primes (although I’m not a huge fan of the 60mm macro…) But the others are small, gorgeous and fast. I love the built-in 23mm (35 equiv.) of the X100s. It’s sharp wide open and it has beautiful flare when you point it right into the sun as seen above. It’s my most-used lens. Which is a good thing, given that it’s welded to X100s.


Painted Hall, Greenwich, UK with Fuji 14mm/2.8

Along with that, the 35/1.4 (50mm equiv., seen at top on left) and 14/2.8 (21mm equiv., on right) are my go-to lenses on the interchangeable lens Fuji bodies. If I am shooting tight headshots, maybe the 56/1.2 in the middle.

As a backup for the lot, I like the 18-55mm f/2.8-4.0 kit zoom (not shown). Which, although not a speed lens, is great optically and has stabilization.


Actor Ben Lurye, with Fuji 18-55 f/2.8-4

Good performance from a kit lens (the zoom that often comes packaged with a camera) is not a given, as many of them are crap. If you are using a kit zoom as your main lens, know that it will be be sharpest near the middle of the aperture scale—let’s say around f/8. In fact, most lenses are great at f/8.

If you like to hang out close to wide open, grab a (used, if necessary) prime at your most-used focal length. You’ll be a happy camper—and have a backup if needed.
__________

What to buy? And when? That should be driven by what/how you shoot.

Here’s my thinking on lens progression, driven by how I shoot. Most of the time I am going to go out with a single, prime lens. I like the size, the weight, the speed and sharpness. Actually, I also like the discipline of having a single focal length. It helps me to see better.

With a new system I’d build out my wide/normal/short-tele primes, then get a decent wide- to short-tele zoom as a backup or for times when I would want one-lens variability. Only then do I start going for more exotic lengths if needed.

The reason is simple: most of my work will be done with the bread-and-butter focal lengths of moderate wide to short tele. So I want good quality, speed and backup in those lengths before I start to get crazy with a superwide or whatever.

You can easily try out a lens for no risk. Buy a good example used, from someone with a good return policy. If the lens is a dog, return it immediately. If it is good enough to where you want to keep it and play, you can always resell the used lens for about what you paid for it within a year or two.

So, very little risk. (In fact, if I was going to need to rent a lens for more than a week I’d do it this way. Your rental would be practically free.

And obviously, if you love a lens and decide to marry it and keep it forever that’s best possible case.

NEXT: Lights

Review of the Sony RX100 III: Field Test in Rio de Janeiro!

We’ve travelled around the world with bags bursting full of camera gear. We lugged our DSLRs up the Andes and through the Amazon, and toted a full size tripod across India. So when we headed to Rio de Janeiro, Brazil to take in the 2014 FIFA World Cup, what did we pack? Only a tiny little […]

Our Trip to Rio de Janeiro, Brazil for World Cup 2014

Last week we got back from our adventure to Rio de Janeiro, Brazil for World Cup 2014. We’re still trying to catch up on sleep, and Max is still waking up on Rio time (4am, ouch!). But more than anything, we still have Rio on the brain. This city really stole our hearts. Here’s a […]

We’re Heading To Rio With (Only) The Sony RX100 III

When our close friends asked us if we wanted to join them in Rio de Janeiro for World Cup 2014 we didn’t hesitate – a good adventurer always says yes to a once-in-a-lifetime experience. But as we got closer and closer to the trip, and started to actually try to figure out the logistics, we were […]