A very talented interior designer friend of mine, Adrienne Chandler, asked if I could take a few photos of an office building she completed. She said the building would be occupied during the shoot and we had a limited amount of time. Knowing I wouldn’t be able to set up lights, I relied on high-dynamic range (HDR) photographs and this is how I got the shot.
Planning
The night before the shoot, I rehearsed how I wanted to capture the HDR shot. I planned on taking five bracketed images in one-stop increments: one under, one over, two under, two over with the first shot being properly exposed. To keep the images from shifting, and to avoid camera shake, I packed my tripod and a cable release. Not knowing the size of the area, I made sure my 24–120mm multi-purpose lens was in my bag.
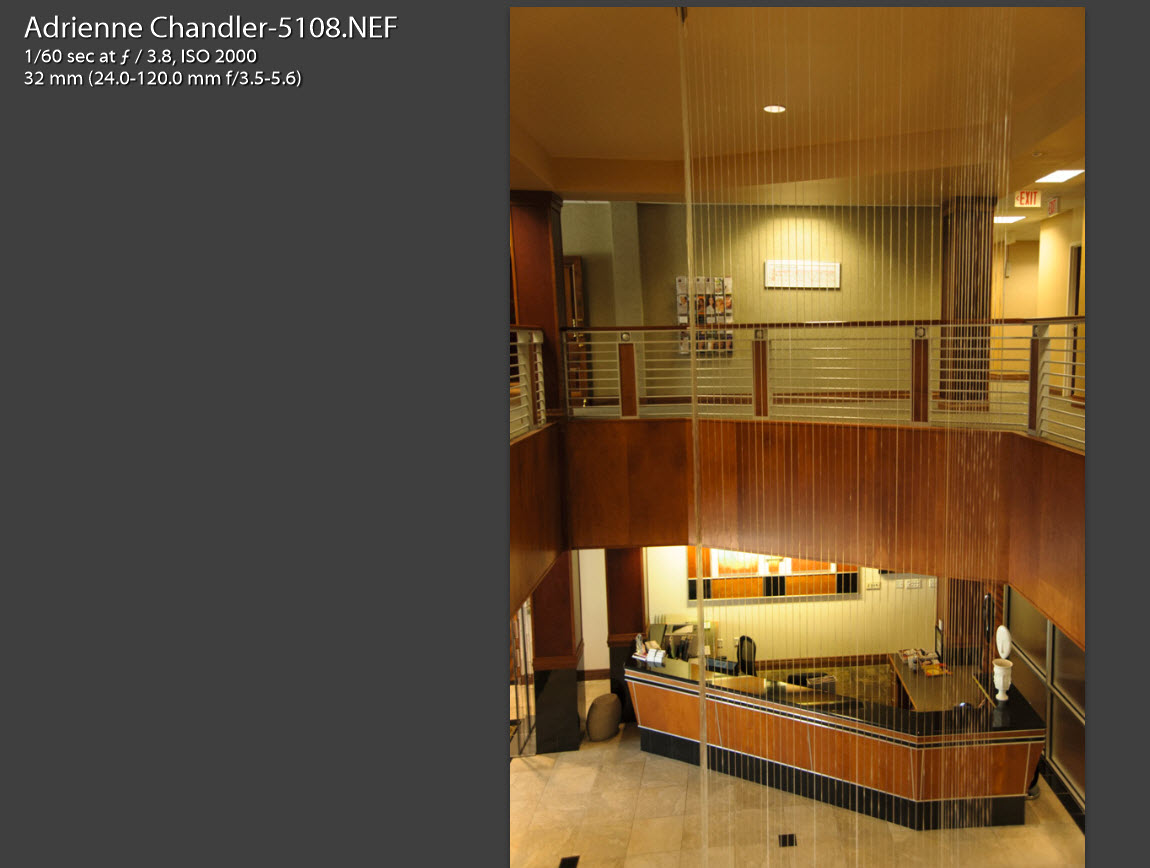


I took a few test shots and found an average exposure I was happy with. I selected five shots for my bracketing with 1-stop under/over. To avoid getting confused on the number of shots I took, I selected burst mode. This allowed me to press and hold the cable release until all five shots were taken. I tweaked my settings and paused for about 10 seconds between sets. This helps programs such as Lightroom to group images based on time between shots.


My processing workflow : Lightroom to Photomatix
Step 1 – Highlight your five bracketed images by holding the shift key and clicking on the first image, then the last. Select Export from the File drop-down menu. Choose Photomatix from the Export to drop-down list and click Export.


Step 2 – Choose these options in the Settings for processing export files dialog box and click Export.

Step 3 – Photomatix’s Deghosting dialog appears. Make changes as needed if ghosting appears then click OK.

Step 4 – For this image, I selected Architecture from the preset drop-down menu and chose an interior preset. Click Save and Re-import to process the image and to return to Lightroom.


Final Thoughts
Although Photomatix did most of the heavy lifting for developing this image, we still have to start with solid images created with a few essential tools: tripod, cable release and a quality lens. The choice to shoot this project in HDR was a simple one. Time was limited and we needed to be as unobtrusive as possible. Setting up lights and taking time to meter each shot wasn’t an option. HDR has received a bad rap over the years because of many over-processed images. These Surreal images have their place, but not when photographing a reference image – our architectural image. Reference images require Realistic processing and, thankfully, programs like Photomatix have built-in presets as guides.
*Feature image © 2015 Vanelli
Vanelli is a photographer, educator and author based in Florida. Currently he shoots for Inside Lacrosse Magazine, teaches workshops, and writes for Photofocus. Click here for a list of Vanelli’s articles.
https://www.facebook.com/mrvanelli
https://twitter.com/vanelli
This Post Sponsored by:
Perfectly Clear for Photoshop or Lightroom is all about saving you time so you can focus on doing what you love best. Get a free trial of the award winning plug-in here.
Lighting Survey. Take the chance to win an iPhone 6s or 6s Plus. Respond to a 5 minute survey regarding lighting equipment for photographers — http://bit.ly/lightingsurvey
Polarr photo editor: All the pro tools, in one place. Polarr brings the most advanced toolset right to your mobile. With curves, dehaze, denoise, custom filters, and more, Polarr makes it easy to edit online or offline. Get it free at https://www.polarr.co/
The HDR Learning Center. Check out new ways to use High Dynamic Range photography to make compelling images. Free tutorials and posts to get results. Produced in partnership with HDRsoft
Arizona Highways Photo Workshops. For more than 30 years, Arizona Highway Photo Workshops has been committed to helping photographers find inspiring destinations, quality education and spectacular images. Get more information (and enter our contest) at http://www.ahpw.org/FindIt/
lynda.com Learn photography anytime, anywhere, and at your own pace—from bite-sized tutorials to comprehensive courses. Try lynda.com free for 10 days by visiting lynda.com/Photofocus
Filed under: HDR, Photography, Software, Technique & Tutorials, Your Focus Tagged: HDR, HDR learning center, How I got the Shot, Interior Architecture, Photomatix, Robert Vanelli, Vanelli 


![]()